|
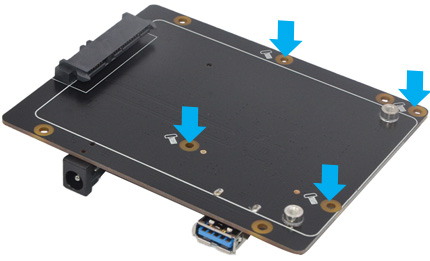
❶ |
Push a screws
(M2.5*5mm) up through
the mounting hole on the underside of the X825 and
screw the spacer (M2.5*12mm)
down until it is hand tight. |
|
|
|
❷ |
Insert your hard disk
into the SATA socket. then press your HDD and
X825 hardly while fastening the screws
(M3*6mm screws).
|
|
 |
|
 |
| |
|
|
|
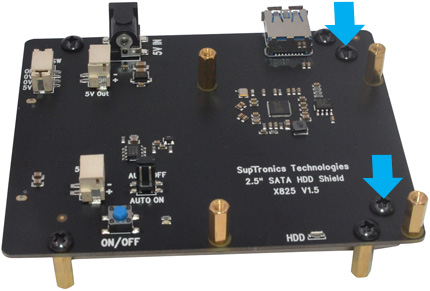
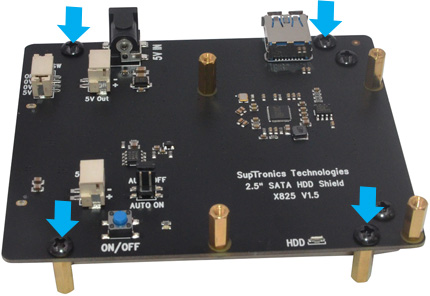
❸ |
Push a screw
(M3*6mm) up through
the mounting hole on the topside of the X825 and
screw the spacer (M3*15mm)
down until it is hand tight. |
 |
|
|
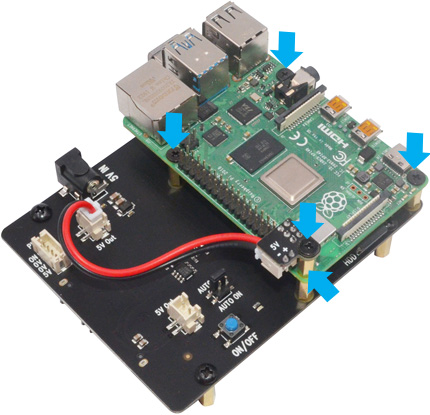
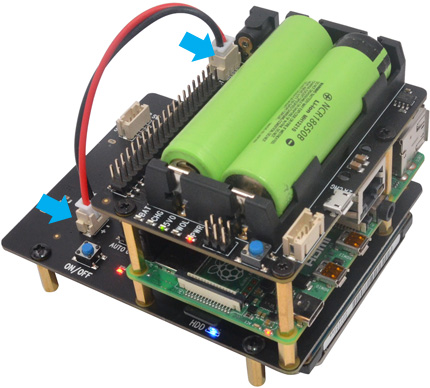
❹ |
a) Place your Raspberry Pi
on top of X825 and screw down
(M2.5*5mm screws + M2.5*11 M/F spacer).
b) Plugs the power daughter board straight into your
Raspberry Pi B's GPIO header and
screw down
(M2.5*5mm)
C) Connect the power cable from power
daughter board to "5V out" power connector on the X825. |
 |
| |
|
|
|
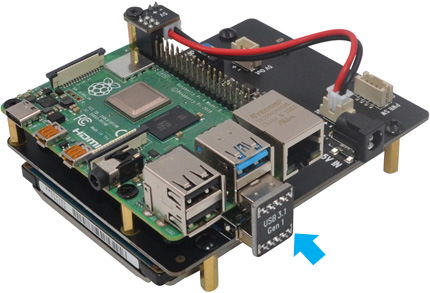
❺ |
Insert the USB bridge.
The
direction of“USB 3.1”must be
upward. |
 |
|
|
❻ |
Optional -To use with
X735 /
X710 /
X765 power
mgmt board
a) Unscrew 4 screws and spacer on
the topside of Raspberry pi
b) Screw the M/F spacer
(M2.5*12mm) down until it is
hand
tight |
|
| |
|
|
|
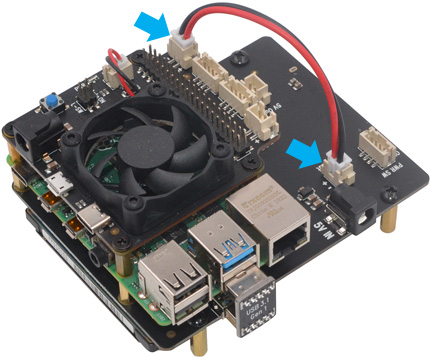
❼ |
Optional -To use with
X735 power
mgmt board
a) Plugs the X735 straight into your Raspberry Pi's GPIO
header and screw down (M2.5*5mm
screws)
b) Connect the 2-pin power cable from "5V out"
connector on the X735 to "5V" power socket on the X825
Power adapter must be
connected to the X735 only , not X825 and Raspberry Pi. |
 |
|
|
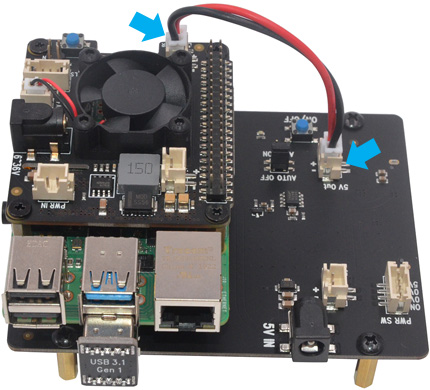
❽ |
Optional -To use with
X710 power mgmt board
a) Plugs the X710 straight into your Raspberry Pi's GPIO
header and screw down (M2.5*5mm
screws)
b) Connect the 2-pin power cable from "5V out"
connector on the X710 to "5V" power socket on the X828
Power adapter must be
connected to the X710 only , not X828 and Raspberry Pi. |
 |
| |
|
|
|
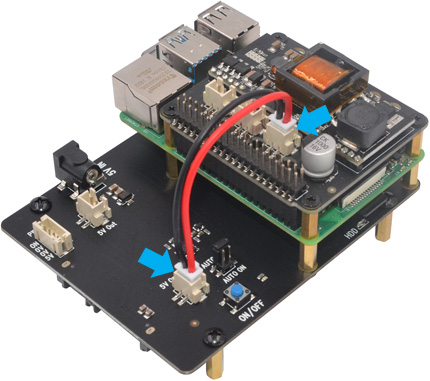
❾ |
Optional -To use with
X765
power mgmt board
a) Plugs the X765 straight into your Raspberry Pi's
GPIO
header and screw down
(M2.5*5mm screws)
b) Connect the 2-pin power cable from "5V
out"
connector on the X710 to "5V" power socket on
the X825.
Don't connect
any power adapter to X825 and Raspberry Pi when
powering over Ethernet. |
|
|
|
❿ |
Optional -To use with
X725
power mgmt board
a) Unscrew screws and spacer on the topside of
Raspberry pi
b) Screw the M/F spacer
(M2.5*23mm) down
until it is hand
tight
c) Plugs the X725 straight
into your Raspberry Pi's GPIO
header and screw down
(M2.5*5mm screws)
b) Connect the 2-pin power cable from "5V
out"
connector on the X725 to "5V" power socket on
the X825.
Power adapter
must be connected to the X725 only , not X825 and
Raspberry Pi
|
|
 |
|
 |
| |
|
|
.jpg)