|
❶ |
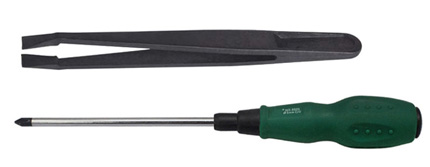
Required toolkit |
| |
Screw diver |
1 pc |
| |
Tweezer |
1 pc |
 |
|
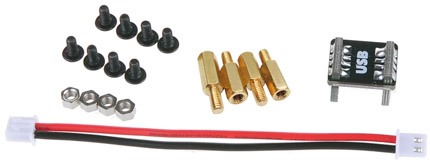
| ❷ |
Required
Accessories for X800K HDD board |
| |
Screw M3 x 6mm |
6
pcs |
| |
Screw nut M3 x 3mm |
4
pcs |
| |
Spacer M2.5 x 6mm |
4
pcs |
| |
USB bridge |
1 pc |
| |
Power connection wire |
1 pc |
|
| |
|
|
|
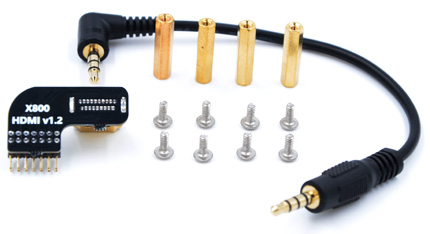
❸ |
Required Accessories for X4000 DAC board
|
| |
Screw M2.5 x 6mm |
8 pcs |
| |
Spacer M2.5 x 20mm |
4 pcs |
| |
HDMI adapter |
1 pc |
| |
Audio cable |
1 pc |
 |
|
|
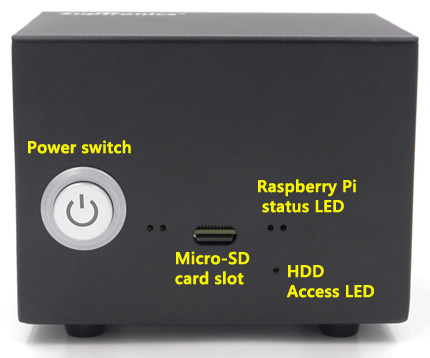
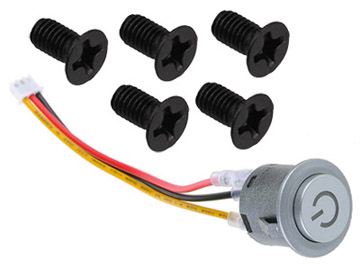
❹ |
Required
Accessories for metal case |
| |
Screw M3 x 4mm |
4
pcs |
| |
Power switch |
1 pc |
|
| |
|
|
|
❺ |
Push a screws
(M2.5*6mm) up through
the mounting hole on the underside of the X800 and
screw the spacer (M2.5*12mm)
down until it is hand tight. |
|
|
|
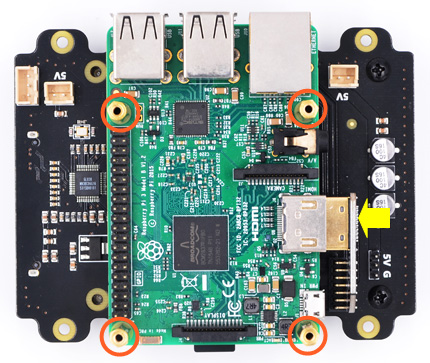
❻ |
Push a screws
(M3*6mm) up through
the mounting hole on the topside of the X800 and
screw the nut (3mm)
down but not over the nut. |
|
 |
|
 |
| |
|
|
|
❼ |
Insert your hard disk
into the SATA socket. then use your thumb
and forefinger of your left hand to press the X800
and HDD as below arrow pointed
vigorously and screw down. |
|
|
|
❽ |
Insert the HDMI adapter
to Raspberry Pi and place
on top of X800 and screw the spacer
(M2.5*20mm)
down until it is hand tight.
|
|
|
|
 |
| |
|
|
|
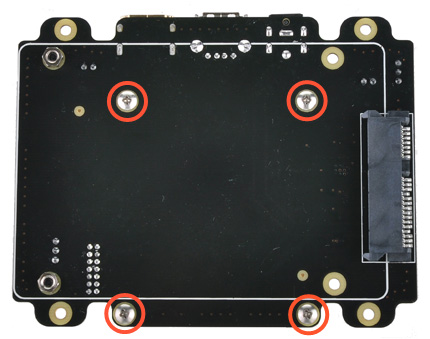
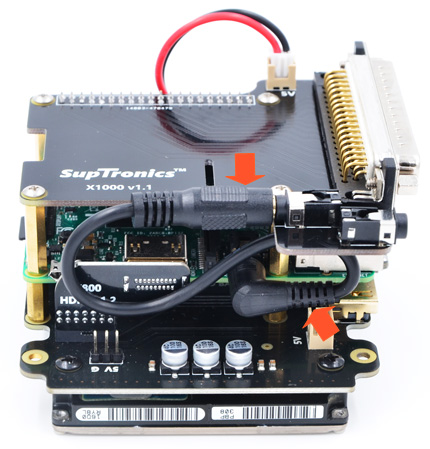
❾ |
Plugs the X1000 board straight into your Raspberry Pi B+'s GPIO
header, Connect the power
cable from X800 to X1000 and screw down
(M2.5*6mm) |
|
|
|
❿ |
Connect the audio cable from Raspberry
Pi to X1000.
|
|
 |
|
 |
| |
|
|
|
|
|
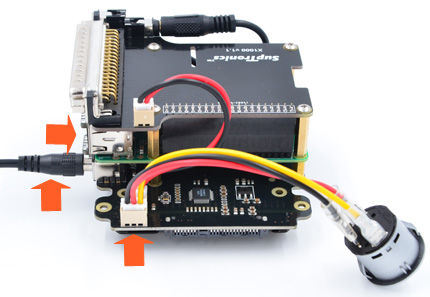
| ⓬ |
Connect the power switch and
power adapter to X800 and test all functions before
putting it into the case |
|
 |
|
 |
| |
|
|
|
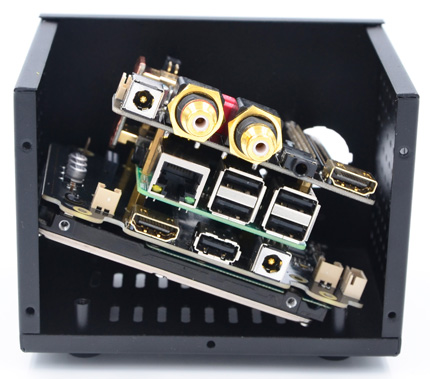
⓭ |
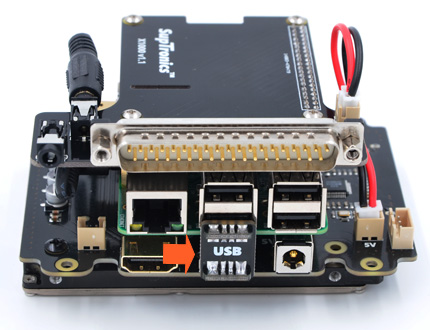
Remove the Micro-SD card and USB bridge from Raspberry Pi,pick
up the board in a tilted position and put it into the
case. |
|
|
|
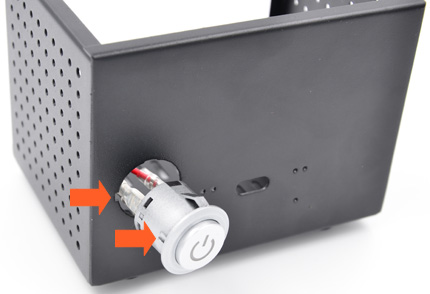
⓮ |
Install the power
switch. Please note the gap positions and press it
into front panel. |
|
 |
|
 |
| |
|
|
|
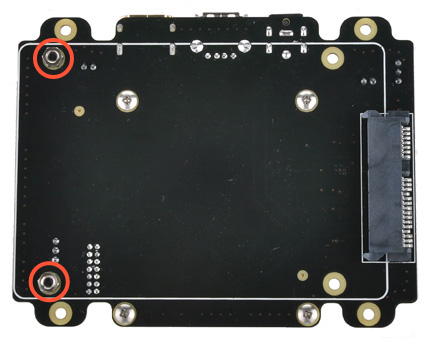
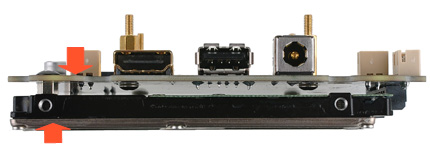
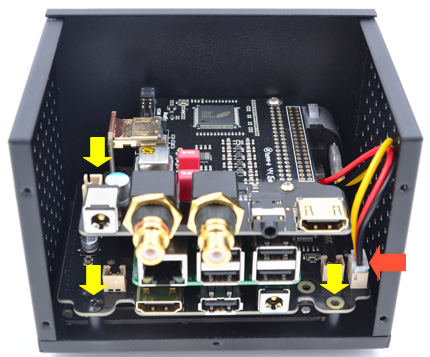
⓯ |
Screw down the X800 board
(Screw M3 x 6mm, 3 positions
as yellow arrow pointed), nipped
the connector of power switch using the
tweezer
and insert it into the
power
socket on
x800 as orange arrow pointed, unscrew the
screws on RCA connectors. |
|
|
|
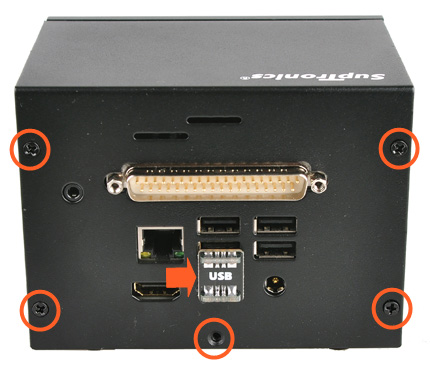
⓰ |
Insert the rear cover
and screw down (M3 x
4mm screws), screw down the
RCA connector and finally insert the USB bridge.
|
|
 |
|
 |