|
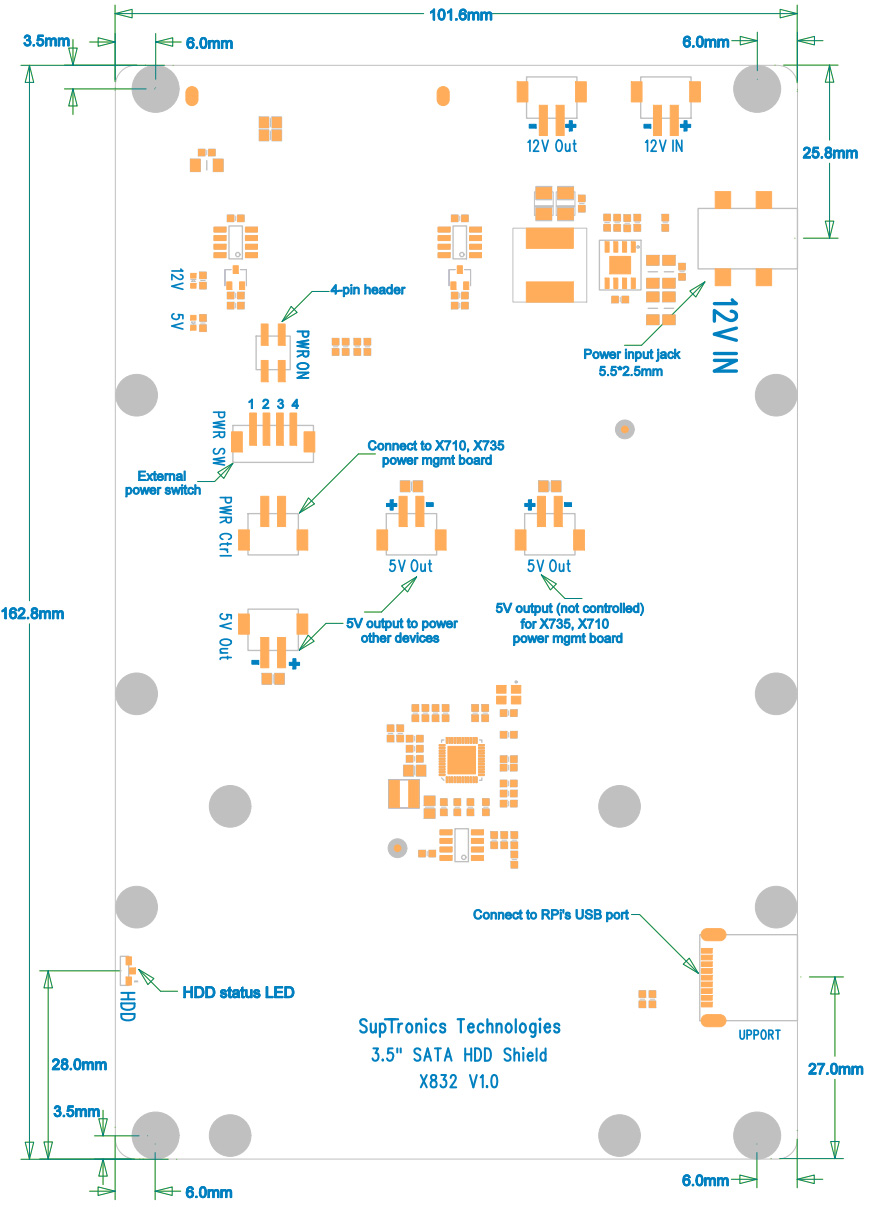
❶ |
Push a
screws
(M2.5*5mm)
up through the mounting hole
on the underside of the X835 and screw the spacer
(M2.5*12mm)
down until it is hand tight. |
 |
|
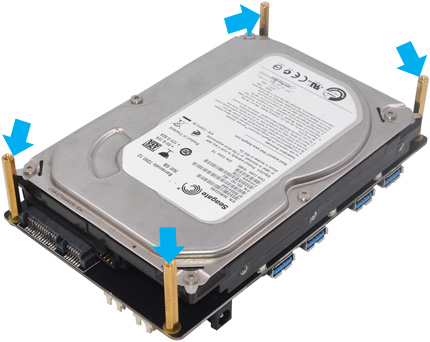
| ❷ |
Insert your 3.5" hard disk
into the SATA socket on the PCB bottom side. |

|
| |
|
|
|
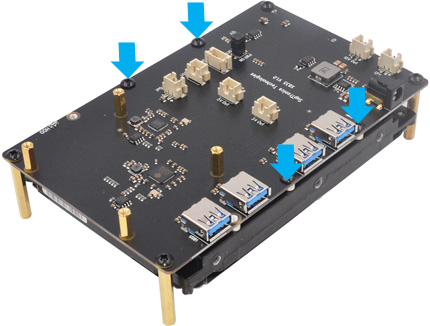
❸ |
Using four M3*8mm screws
to secure the hard drive. |
|
|
|
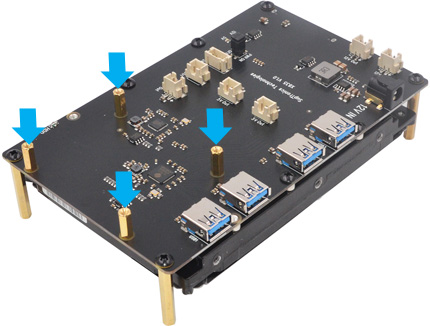
❹ |
Push a screw
(M3*8mm) up through
the mounting hole on the topside of the X835 and
screw the spacer (M3*32mm)
down until it is hand tight. |
|
 |
|
 |
| |
|
|
|
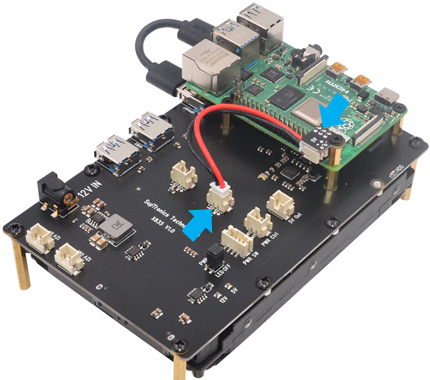
❺ |
a)Place your Raspberry
Pi on top of X835 and screw down.
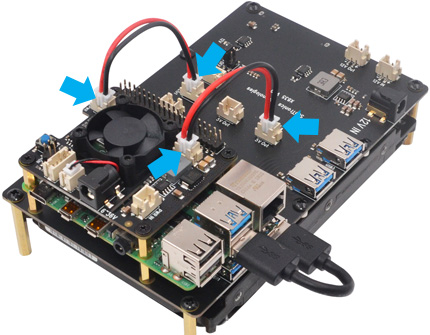
b)Plugs the power daughter board straight
into your
Raspberry Pi B+'s GPIO header.
c)Plugs in the 2-pin power cable into the "5V'
female sockets
on the power daughter board and X835 |
|
|
|
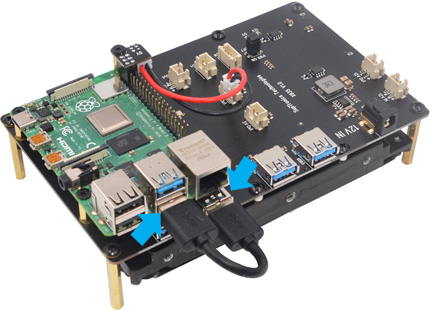
❻ |
Plug in the USB male-to-male cable into the Rpi's USB3.0
port and the "UPPORT" on the X835. |
|
 |
|
 |
| |
|
|
|
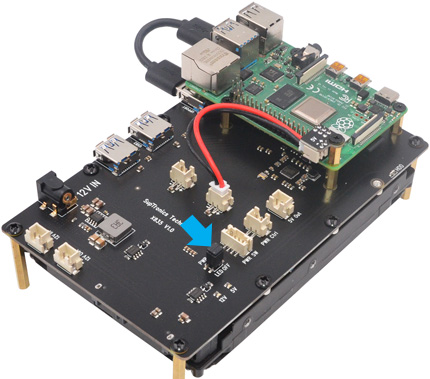
❼ |
Optional -To use with
X735 /
X710 power mgmt board
a)Unscrew 4 screws and
spacer on the topside of Rpi
b)Screw the M2.5*12 M/F spacer down
until it is hand tight
c)Remove the jumper socket fitted for "PWR'. |
|
|
|
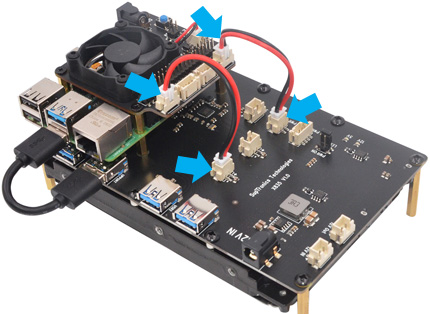
❽ |
a)Plugs
the X735 straight into your Raspberry Pi's GPIO
header and screw down (M2.5*5mm screws)
b) Plug in the 2-pin power cable into the
female JST
connectors on X735 and X835.
Power
adapter must be connected to the X835 only , not
Raspberry Pi and X735. |
|
 |
|
 |
|
|
|
|
|
❾ |
a)Plugs
the X710 straight into your Raspberry Pi's GPIO
header and screw down (M2.5*5mm screws)
b) Plug in the 2-pin power cable into the
female JST
connectors on X710 and X835.
Power
adapter must be connected to the X835 only , not
Raspberry Pi and X710. |
|
|
|
 |
|
|